Finology 大数据金融

通过大数据以量化金融

为了测试把NFS文件系统的共享目录挂载到本地,特意启动了Docker容器来做实验。

执行命令时,必须加入--privileged这个参数,不然在Mount时会报permission denied的错误。

1
docker run -d --privileged <image_id>

查看NFS的共享目录

1
2
3
showmount -e 172.17.0.2
Export list for 172.17.0.2:
/nfs/share *

也可以到NFS服务器上查看/etc/exports文件的内容。

执行挂载命令

1
mount -t nfs 172.17.0.2:/nfs/share /mnt/nfs/

会报如下错误:

1
2
3
4
5
6
7
mount: wrong fs type, bad option, bad superblock on 172.17.0.2:/nfs/share,
missing codepage or helper program, or other error
(for several filesystems (e.g. nfs, cifs) you might
need a /sbin/mount.<type> helper program)

In some cases useful info is found in syslog - try
dmesg | tail or so.

解决办法即是安装NFS的依赖包。

1
yum install -y nfs-utils

安装成功后,再次mount就可以成功了。

当前ubuntu环境

1
2
cat /etc/issue
Ubuntu 19.04 \n \l

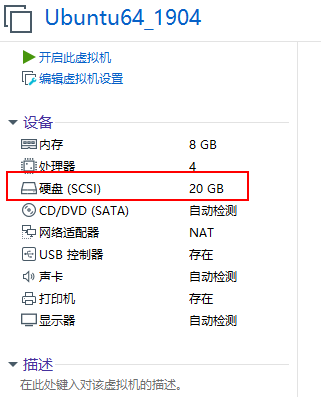
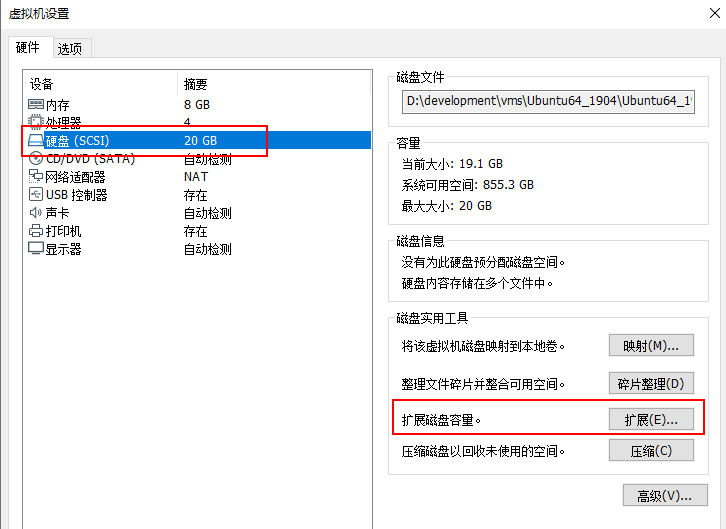
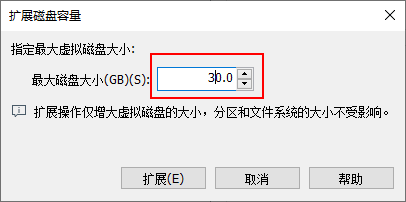
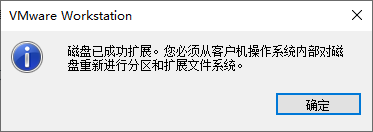
当我们查看文件系统占用情况时,发现有/dev/loop0至/dev/loop7占用率为100%。

1
2
3
4
5
6
7
8
9
10
11
12
13
14
15
16
17
df -h
Filesystem Size Used Avail Use% Mounted on
udev 3.9G 0 3.9G 0% /dev
tmpfs 796M 1.9M 794M 1% /run
/dev/sda1 20G 18G 1.1G 95% /
tmpfs 3.9G 0 3.9G 0% /dev/shm
tmpfs 5.0M 4.0K 5.0M 1% /run/lock
tmpfs 3.9G 0 3.9G 0% /sys/fs/cgroup
/dev/loop0 15M 15M 0 100% /snap/gnome-characters/254
/dev/loop2 90M 90M 0 100% /snap/core/6673
/dev/loop1 3.8M 3.8M 0 100% /snap/gnome-system-monitor/77
/dev/loop3 152M 152M 0 100% /snap/gnome-3-28-1804/31
/dev/loop4 36M 36M 0 100% /snap/gtk-common-themes/1198
/dev/loop7 1.0M 1.0M 0 100% /snap/gnome-logs/61
/dev/loop6 54M 54M 0 100% /snap/core18/941
/dev/loop5 4.2M 4.2M 0 100% /snap/gnome-calculator/406
tmpfs 796M 36K 795M 1% /run/user/1000

/dev/loopn这些设备在Linux下被称为回环设备。

可以通过执行losetup命令查看所有回环设备。

1
2
3
4
5
6
7
8
9
10
losetup
NAME SIZELIMIT OFFSET AUTOCLEAR RO BACK-FILE DIO LOG-SEC
/dev/loop1 0 0 1 1 /var/lib/snapd/snaps/gnome-system-monitor_77.snap 0 512
/dev/loop6 0 0 1 1 /var/lib/snapd/snaps/core18_941.snap 0 512
/dev/loop4 0 0 1 1 /var/lib/snapd/snaps/gtk-common-themes_1198.snap 0 512
/dev/loop2 0 0 1 1 /var/lib/snapd/snaps/core_6673.snap 0 512
/dev/loop0 0 0 1 1 /var/lib/snapd/snaps/gnome-characters_254.snap 0 512
/dev/loop7 0 0 1 1 /var/lib/snapd/snaps/gnome-logs_61.snap 0 512
/dev/loop5 0 0 1 1 /var/lib/snapd/snaps/gnome-calculator_406.snap 0 512
/dev/loop3 0 0 1 1 /var/lib/snapd/snaps/gnome-3-28-1804_31.snap 0 512

我们可以把xxx.iso镜像文件挂载到一个目录下。

1
mount -o loop xxx.iso /media

等同于执行:

1
2
losetup /dev/loop0 xxx.iso
mount /dev/loop0 /media

清理方法

1
2
3
4
5
6
7
8
9
10
11
12
13
14
15
16
17
18
19
20
21
sudo apt autoremove --purge snapd
[sudo] password for simon:
Reading package lists... Done
Building dependency tree
Reading state information... Done
The following additional packages will be installed:
gnome-software gnome-software-common
Suggested packages:
apt-config-icons-hidpi gnome-software-plugin-flatpak
Recommended packages:
gnome-software-plugin-snap
The following packages will be REMOVED:
apg* gnome-control-center-faces* gnome-online-accounts* gnome-software-plugin-snap* libclutter-imcontext-0.1-0* libclutter-imcontext-0.1-bin*
libcolord-gtk1* libgsound0* libgtop-2.0-11* libgtop2-common* mobile-broadband-provider-info* network-manager-gnome* python3-macaroonbakery*
python3-protobuf* python3-rfc3339* python3-tz* snapd* ubuntu-system-service*
The following packages will be upgraded:
gnome-software gnome-software-common
2 upgraded, 0 newly installed, 18 to remove and 171 not upgraded.
Need to get 2,982 kB of archives.
After this operation, 73.7 MB disk space will be freed.
Do you want to continue? [Y/n] y

再次查看磁盘使用情况:

1
2
3
4
5
6
7
8
9
df -h
Filesystem Size Used Avail Use% Mounted on
udev 3.9G 0 3.9G 0% /dev
tmpfs 796M 1.9M 794M 1% /run
/dev/sda1 20G 18G 1.6G 92% /
tmpfs 3.9G 0 3.9G 0% /dev/shm
tmpfs 5.0M 4.0K 5.0M 1% /run/lock
tmpfs 3.9G 0 3.9G 0% /sys/fs/cgroup
tmpfs 796M 36K 795M 1% /run/user/1000

nginx如何配置https?我们今天通过Docker容器启动一台Centos服务器,从自签证书,到nginx安装配置,最终完成配置通过https访问web服务。

运行Centos容器

拉取镜像

1
2
3
4
5
6
docker pull centos
Using default tag: latest
latest: Pulling from library/centos
729ec3a6ada3: Pull complete
Digest: sha256:f94c1d992c193b3dc09e297ffd54d8a4f1dc946c37cbeceb26d35ce1647f88d9
Status: Downloaded newer image for centos:latest

如果拉取得慢的话,可以设置国内的registry镜像。

启动Centos容器

1
2
docker run -dit centos
759dee099156155c7b55b1e4c67bc7a89a52eed1acf865a9fdc1b299d57c33b1

进入容器

1
docker exec -it 759dee099156 bash

生成自签名证书

安装openssl工具

1
yum install openssl

实验原因,我们统一在/opt目录下生成证书。

1
cd /opt

生成CA证书

生成CA私钥ca.key

1
2
3
4
5
openssl genrsa -out ca.key 2048
Generating RSA private key, 2048 bit long modulus (2 primes)
........................................................................+++++
...............+++++
e is 65537 (0x010001)

注意,centos版本如果是CentOS Linux release 8.0.1905 (Core)版本,私钥长度不能设置成1024位,必须2048位。不然再最后启动nginx时会出如下错误。

1
2
nginx: [emerg] SSL_CTX_use_certificate("/opt/server.crt") failed
(SSL: error:140AB18F:SSL routines:SSL_CTX_use_certificate:ee key too small)

生成ca.csr

1
2
3
4
5
6
7
8
9
10
11
12
13
14
15
16
17
18
19
20
openssl req -new -key ca.key -out ca.csr
You are about to be asked to enter information that will be incorporated
into your certificate request.
What you are about to enter is what is called a Distinguished Name or a DN.
There are quite a few fields but you can leave some blank
For some fields there will be a default value,
If you enter '.', the field will be left blank.
-----
Country Name (2 letter code) [XX]:CN
State or Province Name (full name) []:Shanghai
Locality Name (eg, city) [Default City]:Shanghai
Organization Name (eg, company) [Default Company Ltd]:Issuer Co., Ltd
Organizational Unit Name (eg, section) []:Issuer Section
Common Name (eg, your name or your server's hostname) []:localhost
Email Address []:

Please enter the following 'extra' attributes
to be sent with your certificate request
A challenge password []:
An optional company name []:

生成CA证书ca.crt

1
2
3
4
openssl x509 -req -in ca.csr -signkey ca.key -out ca.crt
Signature ok
subject=C = CN, ST = Shanghai, L = Shanghai, O = "Issuer Co., Ltd", OU = Issuer Section, CN = localhost
Getting Private key

生成服务器证书

生成服务器端私钥server.key

1
2
3
4
5
openssl genrsa -out server.key 2048
Generating RSA private key, 2048 bit long modulus (2 primes)
.........+++++
...............................................................................................+++++
e is 65537 (0x010001)

生成服务器端公钥server.pem

1
2
openssl rsa -in server.key -pubout -out server.pem
writing RSA key

生成服务器端csr

服务器端需要向自己的CA机构申请签名证书,在申请签名证书之前,先创建CSR文件。

1
2
3
4
5
6
7
8
9
10
11
12
13
14
15
16
17
18
19
20
openssl req -new -key server.key -out server.csr
You are about to be asked to enter information that will be incorporated
into your certificate request.
What you are about to enter is what is called a Distinguished Name or a DN.
There are quite a few fields but you can leave some blank
For some fields there will be a default value,
If you enter '.', the field will be left blank.
-----
Country Name (2 letter code) [XX]:CN
State or Province Name (full name) []:Shanghai
Locality Name (eg, city) [Default City]:Shanghai
Organization Name (eg, company) [Default Company Ltd]:My Company
Organizational Unit Name (eg, section) []:My Section
Common Name (eg, your name or your server's hostname) []:localhost
Email Address []:

Please enter the following 'extra' attributes
to be sent with your certificate request
A challenge password []:
An optional company name []:

向自己的CA机构申请证书,签名过程需要CA的证书和CA的私钥。最终生成服务器端的CA签名证书server.crtca.srl

1
2
3
4
openssl x509 -req -CA ca.crt -CAkey ca.key -CAcreateserial -in server.csr -out server.crt
Signature ok
subject=C = CN, ST = Shanghai, L = Shanghai, O = My Company, OU = My Section, CN = localhost
Getting CA Private Key

安装配置nginx 1.16

下载nginx源码包

如果没有wget命令需要执行yum install -y wget安装wget工具。

下载源码包

1
wget http://nginx.org/download/nginx-1.16.1.tar.gz

解压

1
tar -zxvf nginx-1.16.1.tar.gz

更改文件所属用户及用户组

在我在docker容器中做实验,所以才会改为root。真实环境改为登录用户帐户就可以了。

1
chown -R root:root nginx-1.16.1

进入目录

1
cd nginx-1.16.1

编译安装

源码编译安装,需要带上--with-http_ssl_module参数以支持ssl。

1
./configure --with-http_ssl_module --with-http_stub_status_module

一路上,有可能会遇到如下问题

1
2
3
4
5
checking for OS
+ Linux 5.0.0-31-generic x86_64
checking for C compiler ... not found

./configure: error: C compiler cc is not found

安装C编译器以解决

1
yum install -y gcc

找不到PCRE library

1
2
3
4
./configure: error: the HTTP rewrite module requires the PCRE library.
You can either disable the module by using --without-http_rewrite_module
option, or install the PCRE library into the system, or build the PCRE library
statically from the source with nginx by using --with-pcre=<path> option.

安装pcre-devel

1
yum install -y pcre-devel

找不到OpenSSL library

1
2
3
4
./configure: error: SSL modules require the OpenSSL library.
You can either do not enable the modules, or install the OpenSSL library
into the system, or build the OpenSSL library statically from the source
with nginx by using --with-openssl=<path> option.

还记得我们前面只安装了openssl么?这里还需要安装

1
yum install -y openssl-devel

上面三个问题解决以后,就可以成功安装nginx了

执行make时,如果没有还需要安装

1
yum install -y make
1
make & make install

配置nginx

1
vi /usr/local/nginx/conf/nginx.conf

按照HTTPS server段的模板内容,进行配置。

配置的内容如下:

1
2
3
4
5
6
7
8
9
10
11
12
13
14
15
16
17
18
19
20
# HTTPS server
#
server {
listen 443 ssl;
server_name localhost;

ssl_certificate /opt/server.crt;
ssl_certificate_key /opt/server.key;

# ssl_session_cache shared:SSL:1m;
# ssl_session_timeout 5m;

# ssl_ciphers HIGH:!aNULL:!MD5;
# ssl_prefer_server_ciphers on;

location / {
root html;
index index.html index.htm;
}
}

启动nginx

1
/usr/local/nginx/sbin/nginx

这个时候访问https://172.17.0.2/,就能看到nginx的欢迎页面了。

当然,你也可以直接访问http://172.17.0.2/也是可以访问的。

优化nginx配置

先注释或删除掉默认的server段配置。这个时候,80端口就没有监听了。然后再添加如下配置。

1
2
3
4
5
server {
listen 80;
server_name localhost;
rewrite ^(.*) https://$host$1 permanent;
}

这个时候,访问http://172.17.0.2/就会自动跳转到https://172.17.0.2/

查看证书详情

1
2
3
4
5
6
7
8
9
Issued To
Common Name (CN) localhost
Organization (O) My Company
Organizational Unit (OU) My Section

Issued By
Common Name (CN) localhost
Organization (O) Issuer Company
Organizational Unit (OU) Issuer Section
0%