Python matplotlib.rcParams常用设置
matplotlib是Python的画图工具。
可以通过对 matplotlib.rcParams 字典做一些常用的设置,例如:
1 | import matplotlib.pyplot as plt |
其实在新的版本中,中文显示和负号显示已经默认显示正常了。
matplotlib是Python的画图工具。
可以通过对 matplotlib.rcParams 字典做一些常用的设置,例如:
1 | import matplotlib.pyplot as plt |
其实在新的版本中,中文显示和负号显示已经默认显示正常了。
一个对象属性很多,要设置其属性的时候很麻烦,不小心还会漏掉。
IDEA可以使用一款插件,GenerateAllSetter,可以一键生成所有属性的set方法。
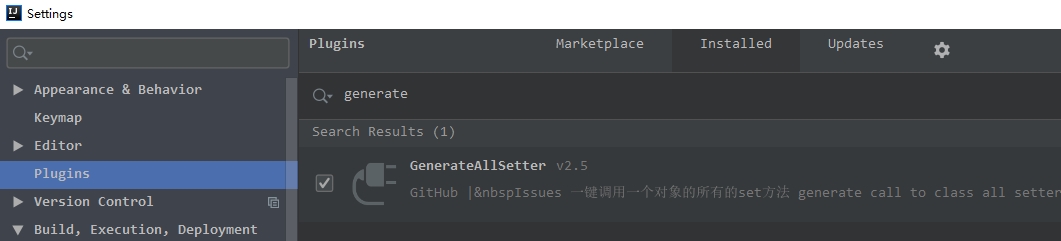
安装好插件以后,在语句 User user = new User() 中的 user 上使用快捷键 Alt + Enter,就会出现自动生成set方法的选项了。
通过命令安装ipython。
1 | conda install ipython jupyter |
通过命令进入ipython研究环境:
1 | ipython |
测试
1 | In [1]: from math import sqrt |