Cursor终端配置python虚拟环境
终端 profile 设置

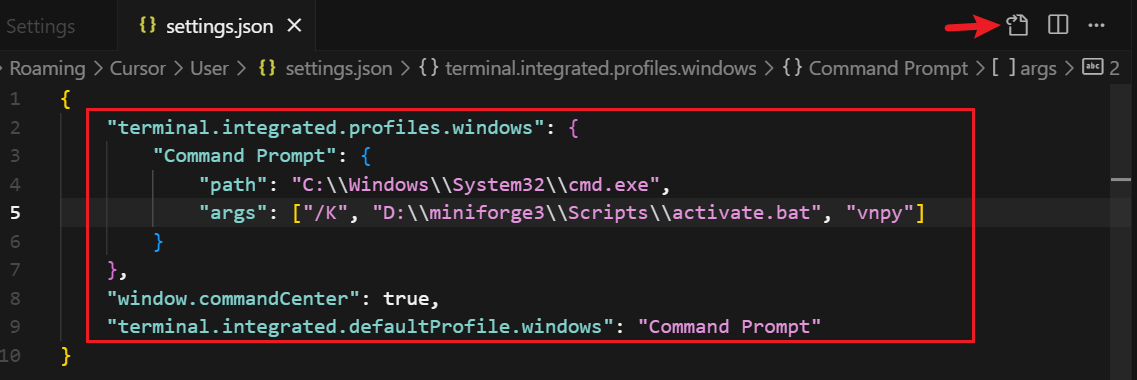
在配置文件中,确保要有如下配置:
即可以启动 vnpy python虚拟环境
1 | { |
终端 profile 设置
在配置文件中,确保要有如下配置:
即可以启动 vnpy python虚拟环境
1 | { |
当一个项目中出现多于一个 Kafka 集群时,这时需要让 Springboot 自动装配失效。
首页在 pom.xml 里面添加依赖
1 | <dependency> |
在项目启动类上加上如下注解:
1 |
在 yaml 文件中配置如下:
1 | spring: |
创建 Kafka 配置类
1 | package gy.finolo.config.kafka; |
在服务类里面,注入 KafkaTemplate,然后调用 send 方法就是了
1 |
|
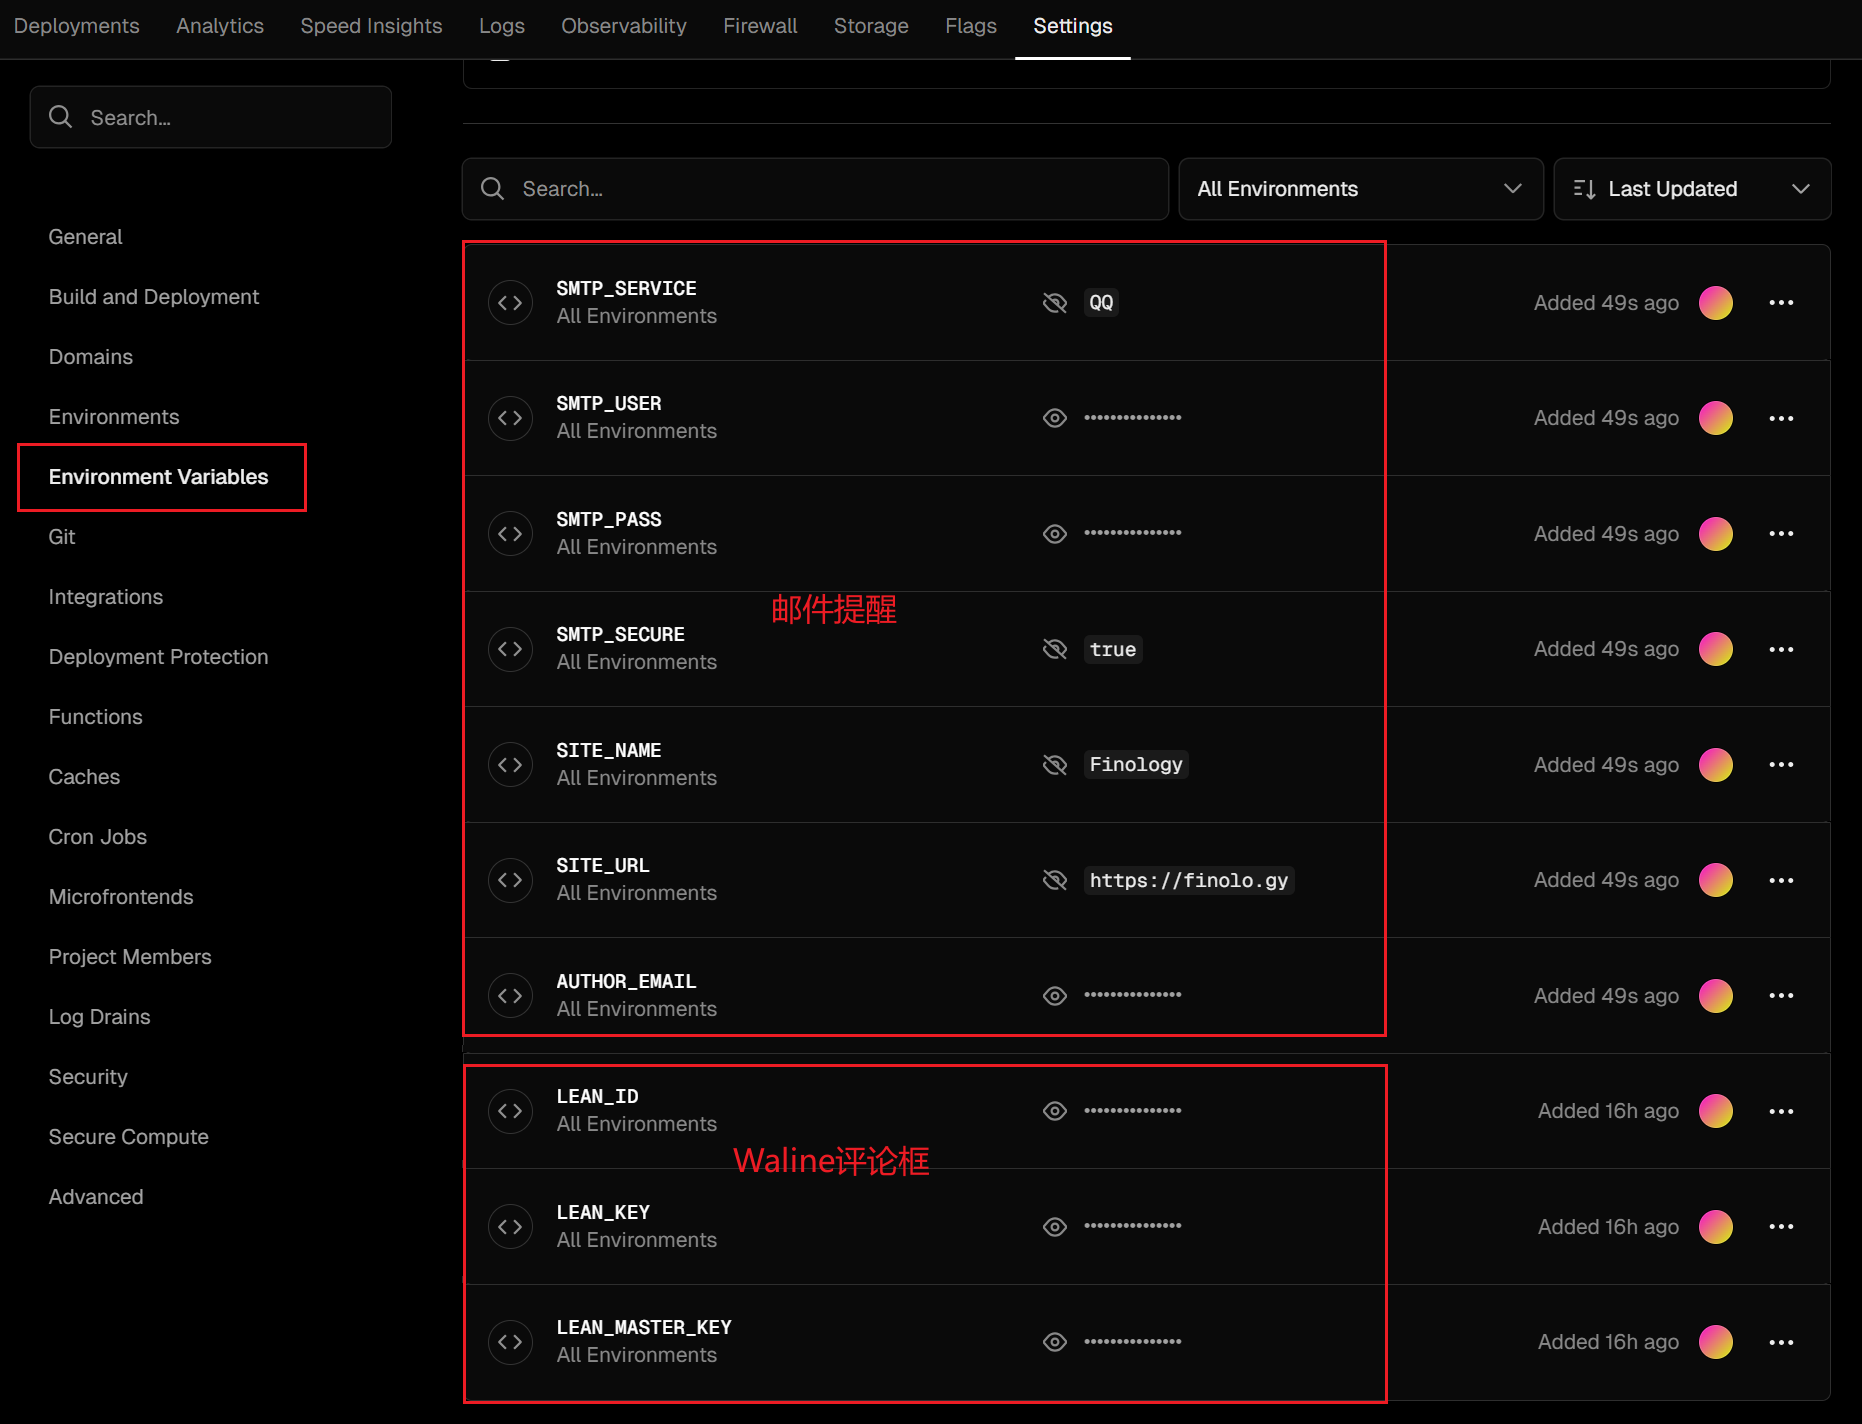
之前文章下面一直使用的是Valine评论框,Valine已经不开源了,所以也遭到了开源社区的抛弃。
使用新版本的 Hexo NexT,哪怕是安装了主题作者提供的 Valine 插件,也不能正常使用。
不过有非常完美的替代方案,使用 Waline,数据结构都是相同的,迁移起来非常方便。
在 Hexo NexT 主题下配置 Waline 评论系统和邮件提醒的方法:
一、安装插件
1 | npm install @waline/hexo-next |
并在 _config.next.yml 配置文件里面配置参数
这下面有些参数可能是没有用的,这个自行研究一下。
1 | waline: |
二、注册leanCloud
推荐注册海外版,使用国内版的话,在域名上会有限制,需要备案之类的。
三、Vercel部署
根据官网的安装方法,一步步操作就行
https://waline.js.org/guide/get-started/
在部署的时候,如果需要配置邮件提醒,还需要添加如下环境变量。