这篇文章讲讲在macOS系统中,如何一步一步创建一个基于Anaconda的项目。
首先我们得确定已经在macOS中安装好了Anaconda。
新建Python环境
先查看一下当前环境,只有一个base。
1 | conda env list |
以克隆方式创建一个和Anaconda base(root)环境一样的环境,取名叫py37。
1 | conda create --name py37 --clone base |
按提示激活命令激活环境。
1 | conda activate py37 |
新建Python项目
File -> New -> Project…

选择Python项目,New一个Project SDK。
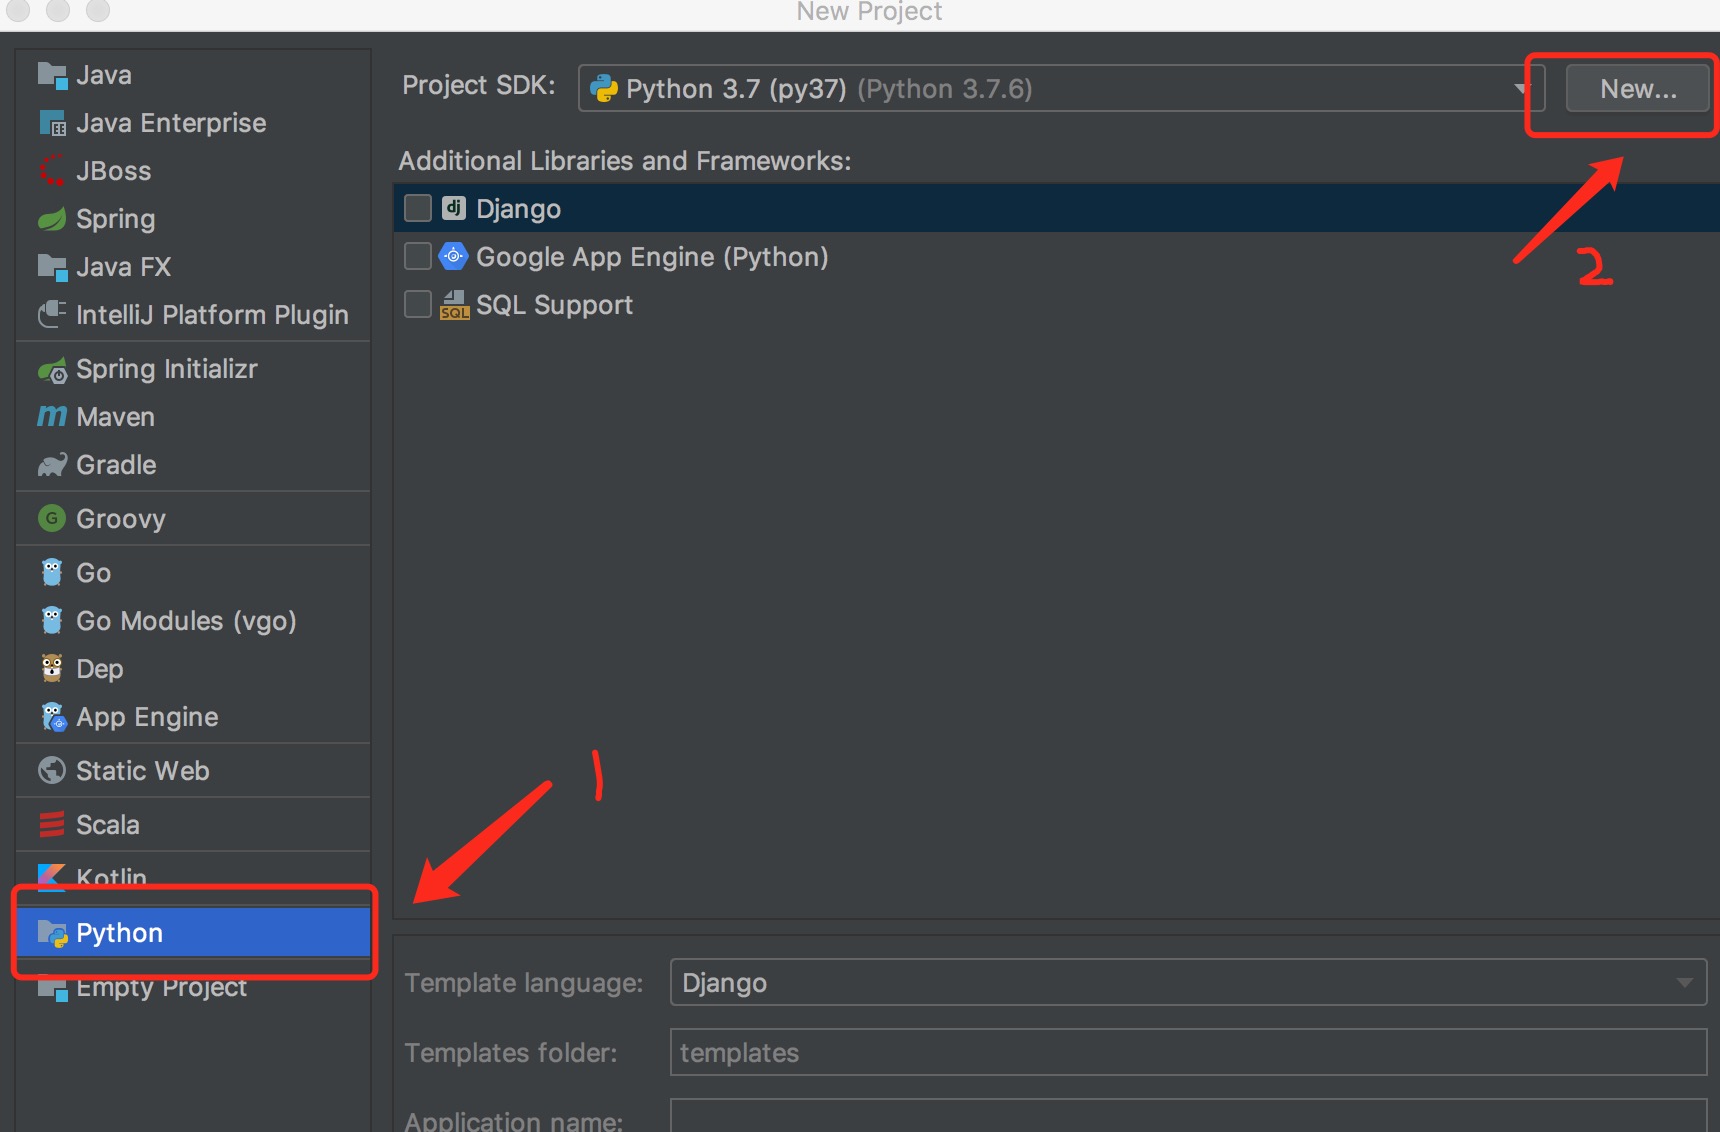
添加Python解析器
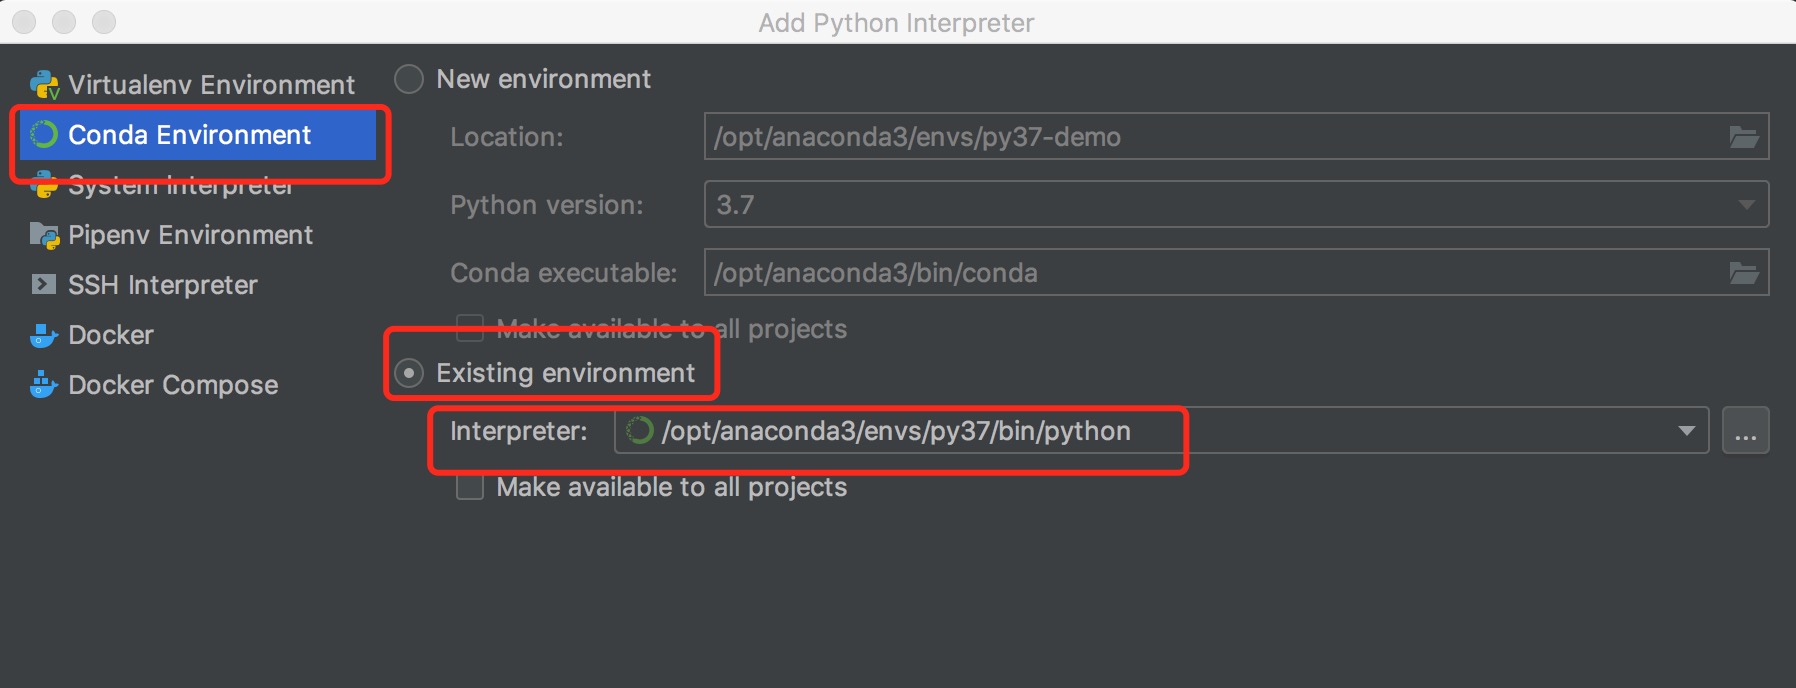
选择 Conda Environment,使用Conda来管理包。
我们前面使用命令行的方式创建一个env,所以选择Existing Environment。
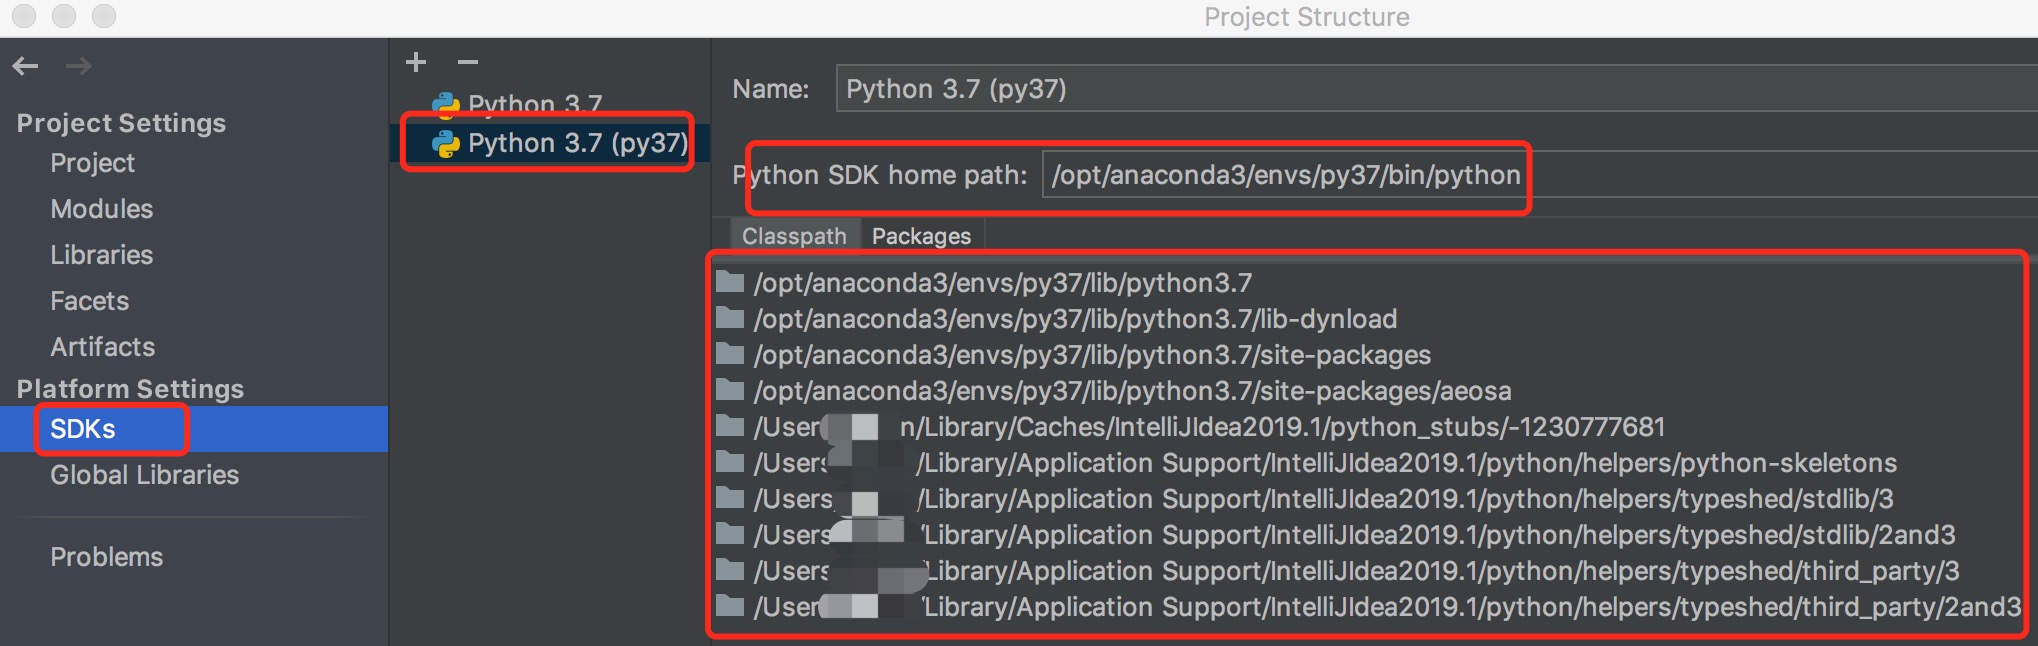
指定Interpreter,为刚才新建环境py37目录下的python。
/opt/anaconda3/envs/py37/bin/python
然后下一步,确定就创建好了。
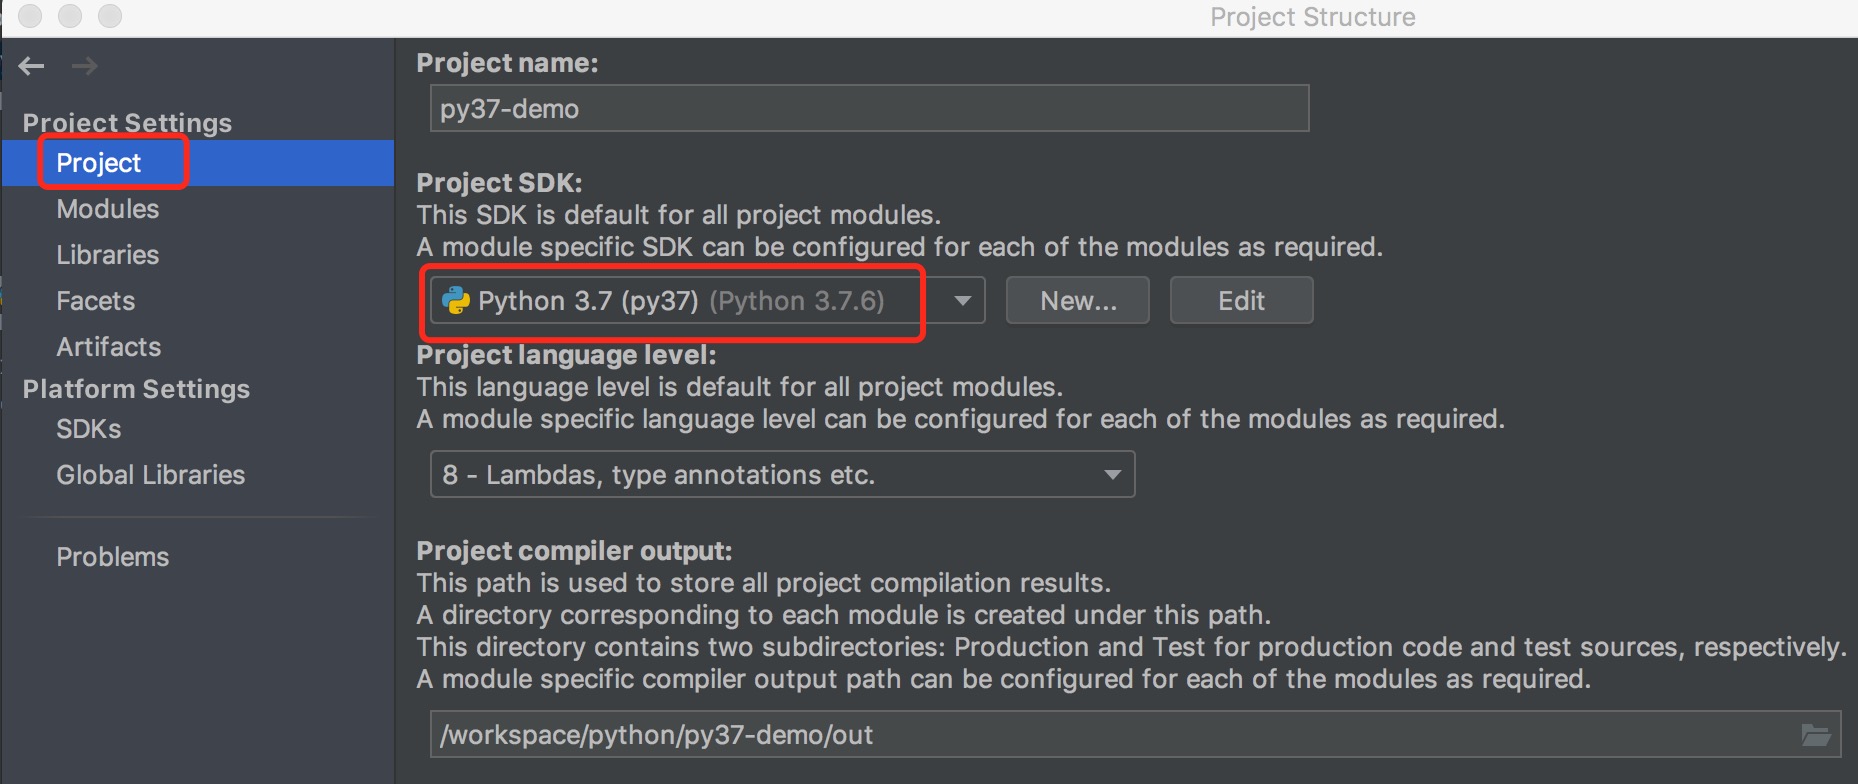
检查
创建好项目后,我们写两行python代码。
1 | import pandas as pd |
检查,pandas, print下面没有红线,按Command,同时鼠标点击pandas或print,均能查看得到源代码,运行时,也会正常运行,说明配置一切正常。
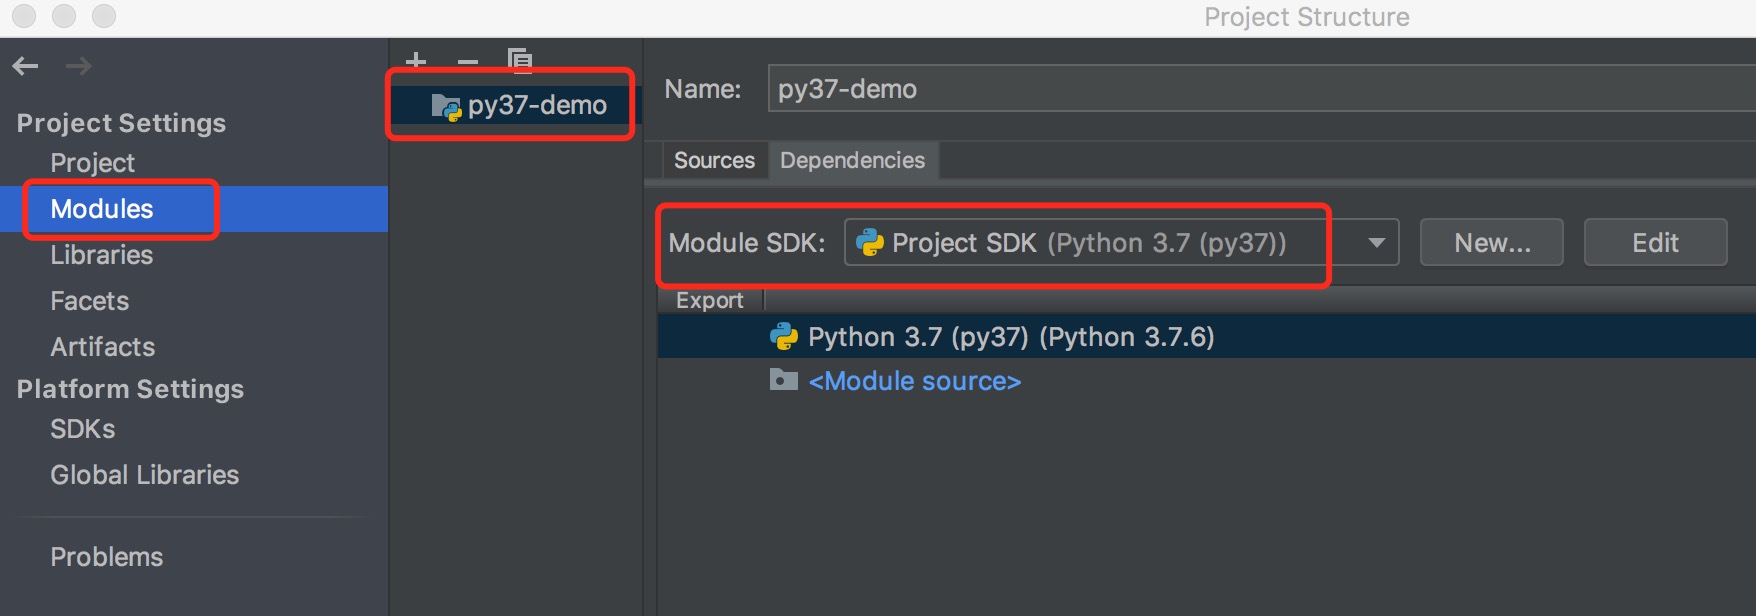
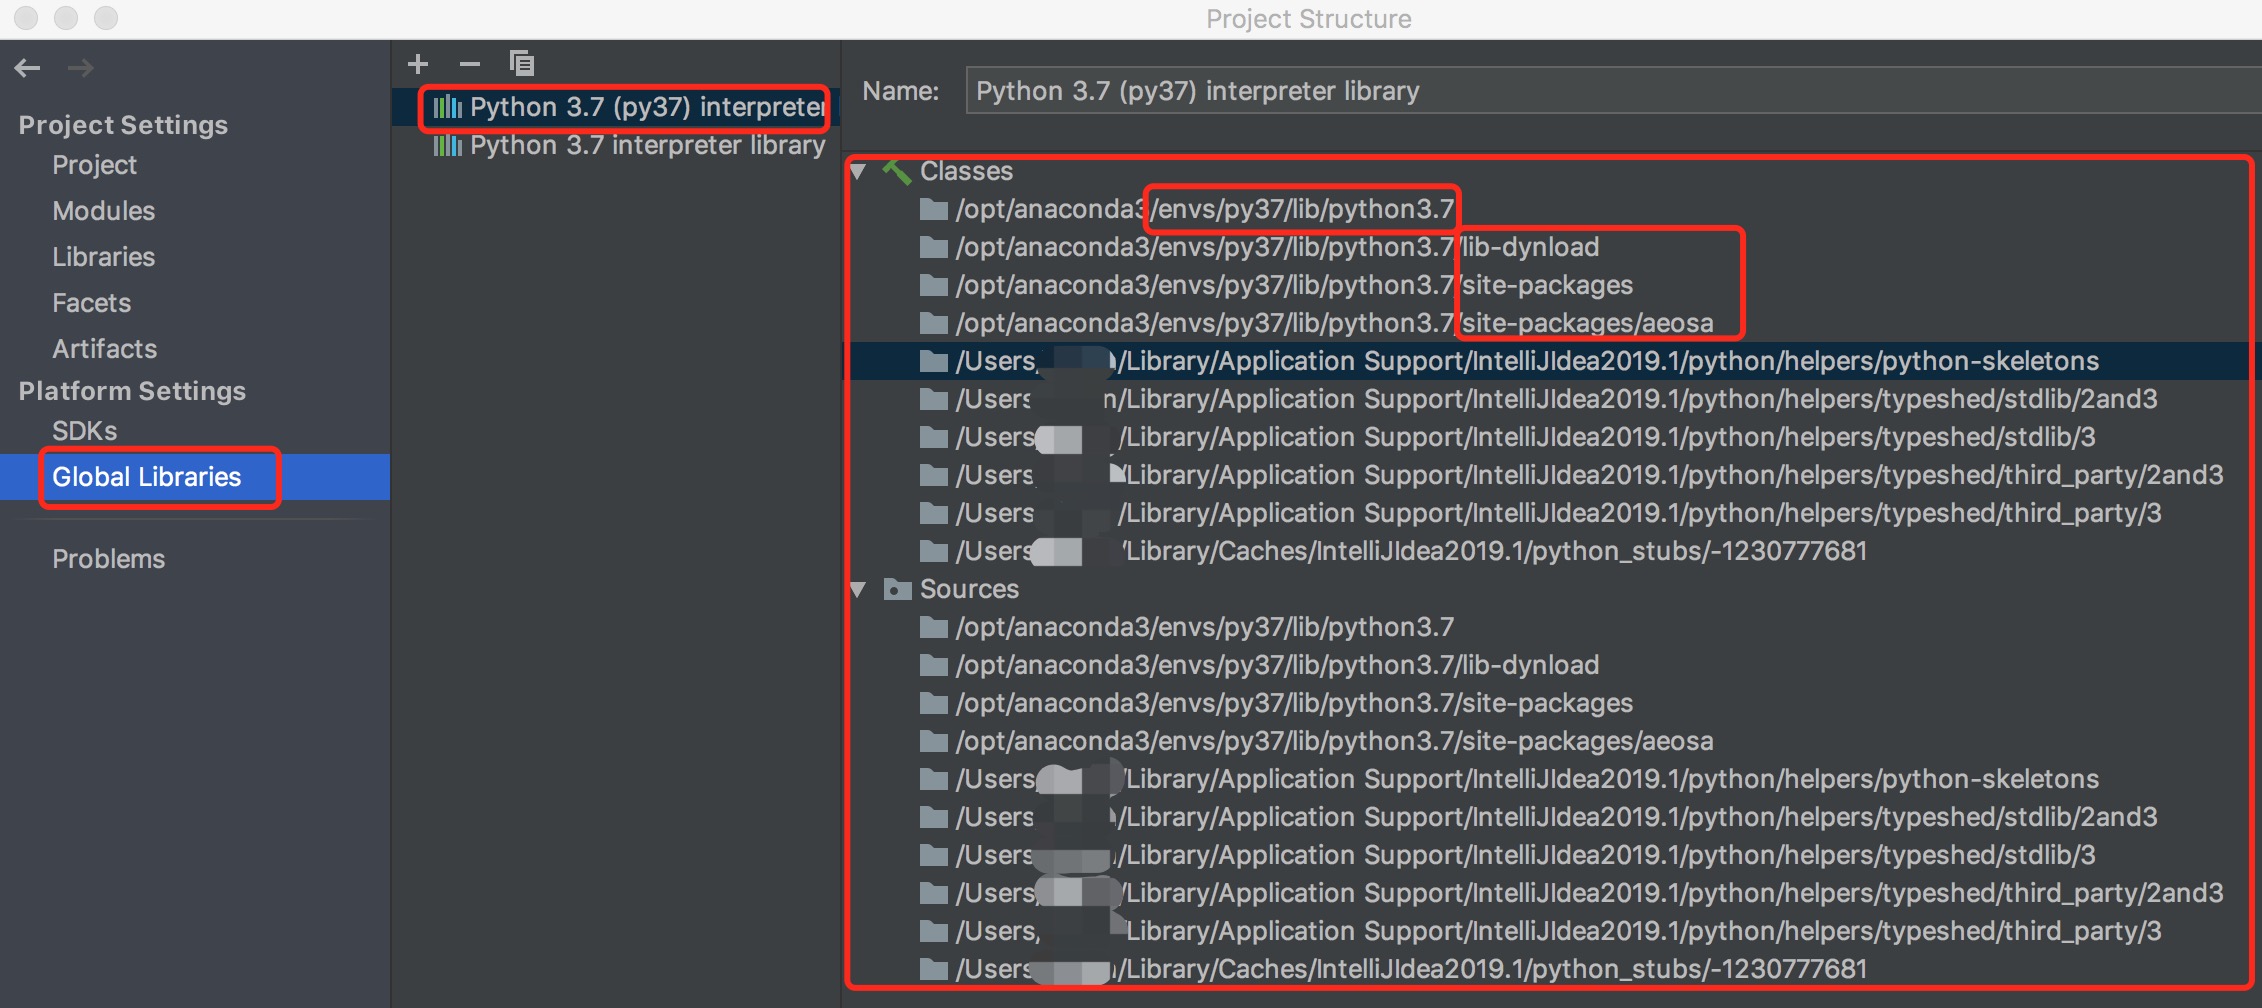
我们再看看项目结构。